前回は、赤外線受信モジュールと赤外線LEDの使い方を学びました。今回は応用としてリモコン家電を操作する「スマートコントローラー」を作成してみます。リモコンで操作できる家電は皆さんの部屋の中にもいろいろあると思います。筆者も作成にあたって家の中のリモコンを片っ端から集めて作成します!
今回の電子工作レシピ
完成までの時間目安:90分
必要なパーツ
- Arduino本体(Arduino UNO R3)https://www.switch-science.com/catalog/789/
- ブレッドボード http://www.sengoku.co.jp/mod/sgk_cart/detail.php?code=3DBC-TCK4
- 赤外線リモコン受信モジュール SPS-440-1(38kHz)http://akizukidenshi.com/catalog/g/gI-00614/
- 5mm赤外線LED OSI5LA5113A http://akizukidenshi.com/catalog/g/gI-04311/
- CDSセンサ(光センサ) http://akizukidenshi.com/catalog/g/gI-00110/
- タクトスイッチ http://akizukidenshi.com/catalog/g/gP-03647/
- 抵抗器(220Ω)
スマートコントローラーの仕様を決める
さっそく手を動かしたいところですが、まずは仕様を決めます。
- 光センサーや温度センサーと組み合わせてセンサーの数値を条件に自動操作
- PCやスマートフォンからスマートコントローラーを経由して家電を操作できる
というところでしょうか。今回はこのふたつの機能を実装してみます。
1)光センサーの数値を受けてリモコン信号を送信する
今回、制作を行っている部屋は、照明のリモコン操作が可能です。筆者はいつも気づいたら夕方で、少し暗くなった部屋の中でリモコンを探して照明をつける、なんてことが日常茶飯事なので、光センサーを利用してある一定の暗さになったら自動的に照明をつける信号が送信されるようにします。
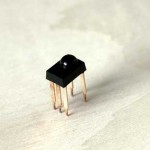
Arduinoに照明を点灯させる信号を登録させます。前回と同じように、受信するプログラムをArduinoに書き込んで照明のリモコンを赤外線受信モジュールに向けてコードを解析します。
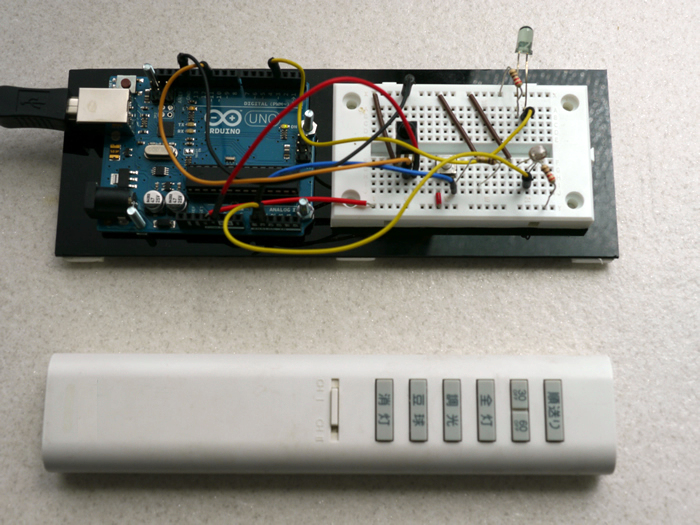
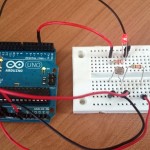
写真2 照明リモコンとArduino
次に、送信プログラムをArduinoに書き込んで、Arduinoから照明を点灯できるか確認します。今回利用したリモコンの「全灯」を解析して、送信できるようにしました。
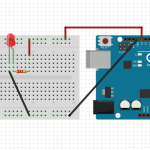
リモコン信号の準備ができたところで光センサーを回路に加え、光センサーからの値が暗くなった場合にリモコン信号を送信するプログラムにします。プログラムは、光センサーに人が一瞬横切った場合などに反応しないように、連続で暗い状態を検出した場合にのみリモコン信号を出すようにしています。(光センサーの詳しい回路説明は第5回を参照)
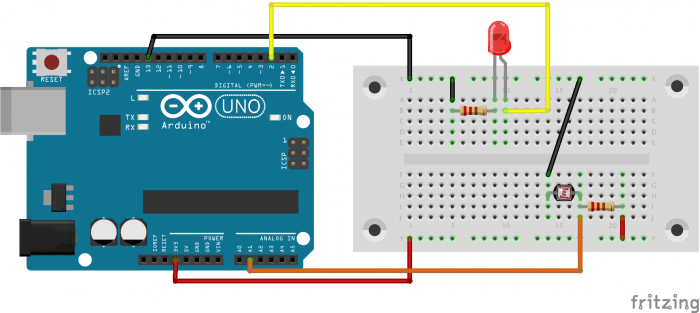
図1 光センサーと赤外線LED送信回路
プログラム:光センサーの値で照明をONにするプログラム
#include <IRremote.h>

IRsend irsend;

int pin = A1;
int count = 0;	//連続して暗い状態をカウント

void setup()
{
  Serial.begin(9600);
}

void loop() {
  int s = analogRead(pin);  //光センサーの値を入力
  Serial.println(s);
  if (s > 660) {  //指定の入力条件を満たした時(暗くなった時)
	count++;
	if(count > 5){
	    Serial.println("Light ON");
	    for (int i = 0; i < 3; i++) {
	      irsend.sendNEC(0xa90, 12); // 照明のON
	      delay(40);
        }
	    count = 0;
	}
  }
  else{
	count = 0;	//途中で明るくなったらカウントをリセット
  }
  delay(5000);
}
これで、暗くなると仕様の1番目である「光センサーの状態でリモコン信号を発信できる機能」が整いましたね!
2)ネットワーク経由でリモコン信号を送信する
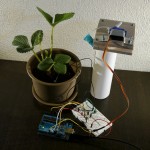
光センサーでリモコン信号を送信できるようになったので、次にネットワークを通じてスマートフォンやPCからリモコン信号を送信できるようにしてみます。これまでも度々出てきているイーサネットシールドを使い、Arduinoをサーバーにして、サーバーに表示されているHTMLからリモコン操作ができるようにしてみます。
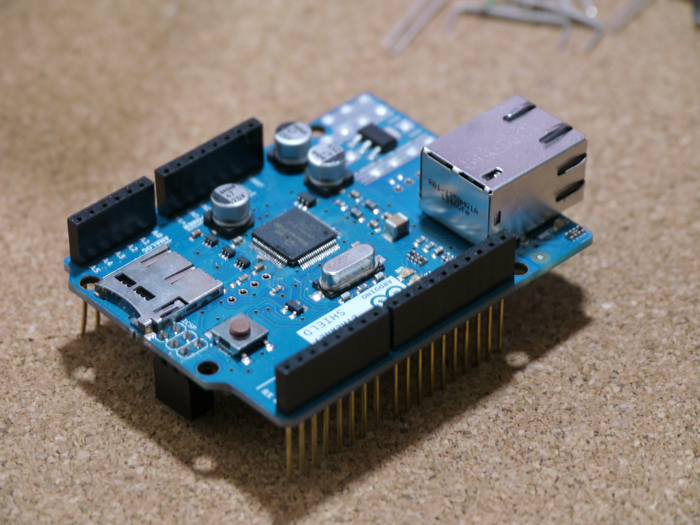
写真3 Arduinoイーサネットシールド
はじめに、ArduinoをWEBサーバーとして動作させて、サーバーに接続した際に表示されるHTML上のボタンによってLEDをオンオフできるようにします。これができれば、LEDの部分をリモコン信号に置き換えてプログラムを書き換えます。
※今回プログラムでは、テキスト解析用ライブラリの「TextFinder」を利用しています。(ライブラリの追加方法は第20回を参照)
#include <SPI.h>
#include <Ethernet.h>
#include "TextFinder.h"

byte mac[] = {
0x90, 0xA2, 0xDA, 0x0F, 0x3F, 0x0D
};
IPAddress ip(192,168,0,20);

// Initialize the Ethernet server library
// with the IP address and port you want to use
// (port 80 is default for HTTP):
EthernetServer server(80);

int lightPin = A0;
int ledPin1 = 3;
int ledPin2 = 2;

void setup() {
// Open serial communications and wait for port to open:
Serial.begin(9600);
while (!Serial) {
; // wait for serial port to connect. Needed for Leonardo only
}
// start the Ethernet connection and the server:
Ethernet.begin(mac, ip);
server.begin();
Serial.print("server is at ");
Serial.println(Ethernet.localIP());

pinMode(ledPin1, OUTPUT);
pinMode(ledPin2, OUTPUT);

}
void loop() {
// listen for incoming clients
EthernetClient client = server.available();
if (client) {

//*******************************************
//* GET形式でデータの受け渡しがあったとき
//*******************************************
TextFinder finder(client);
if (finder.find("GET"))
{
while (finder.findUntil("mode", "\n\r"))
{
int val = finder.getValue();
Serial.println("val="+String(val));
//tv on
if (val == 1)
{
digitalWrite(ledPin1,HIGH);
delay(1000);
digitalWrite(ledPin1,LOW);
Serial.println(" ON");
}
//light on
else if (val == 2)
{
digitalWrite(ledPin2,HIGH);
delay(1000);
digitalWrite(ledPin2,LOW);
Serial.println(" ON");
}
}
}
//*******************************************
Serial.println("new client");
// an http request ends with a blank line
boolean currentLineIsBlank = true;
while (client.connected()) {
if (client.available()) {
char c = client.read();
Serial.write(c);
// if you've gotten to the end of the line (received a newline
// character) and the line is blank, the http request has ended,
// so you can send a reply
if (c == '\n' && currentLineIsBlank) {
// send a standard http response header
client.println("HTTP/1.1 200 OK");
client.println("Content-Type: text/html");
client.println("Connection: close"); // the connection will be closed after completion of the response
//client.println("Refresh: 5"); // refresh the page automatically every 5 sec
client.println();
client.println("<!DOCTYPE HTML>");
client.println("<html>");

//*************************************************
//* bootstrap
//*************************************************
client.println("<head>");
client.println("<link rel='stylesheet' href='https://maxcdn.bootstrapcdn.com/bootstrap/3.3.4/css/bootstrap.min.css'>");
client.println("<link rel='stylesheet' href='https://maxcdn.bootstrapcdn.com/bootstrap/3.3.4/css/bootstrap-theme.min.css'>");
client.println("<script src='https://maxcdn.bootstrapcdn.com/bootstrap/3.3.4/js/bootstrap.min.js'></script>");
client.println("</head>");
//*************************************************
client.println("<body>");

client.println("<a class='btn btn-primary' href='/?mode=1'>TV ON</a> ");
client.println("<a class='btn btn-primary' href='/?mode=2'>Light ON</a><hr/>");
// output the value of each analog input pin
int sensorReading = analogRead(lightPin);
client.println("Light:");
client.println(sensorReading);
client.println("<br />");
client.println("</body>");
client.println("</html>");
break;
}
if (c == '\n') {
// you're starting a new line
currentLineIsBlank = true;
}
else if (c != '\r') {
// you've gotten a character on the current line
currentLineIsBlank = false;
}
}
}
// give the web browser time to receive the data
delay(1);
// close the connection:
client.stop();
Serial.println("client disconnected");
}
}
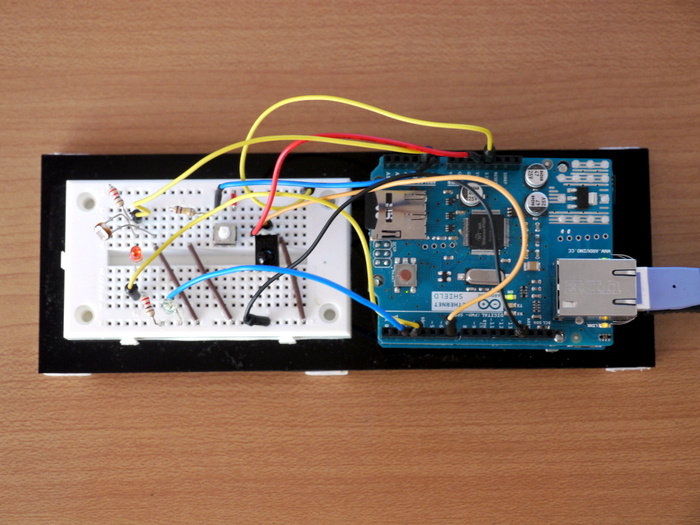
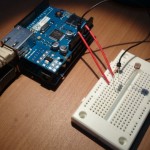
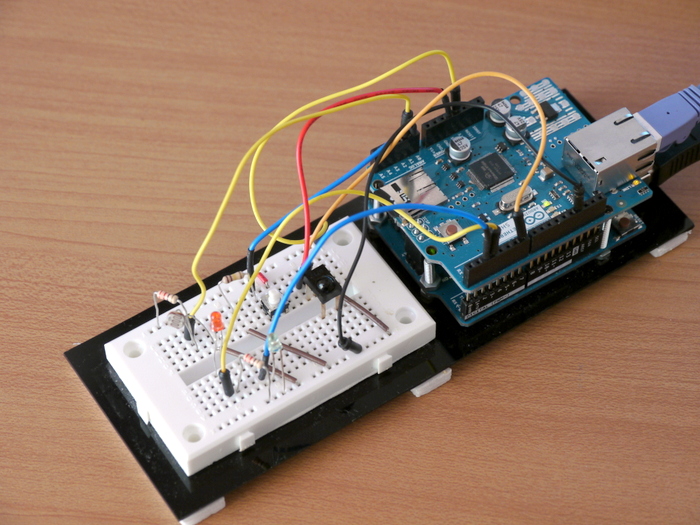
写真4 WebサーバーからLEDを光らせるテスト回路
無事、WEBサーバーからLEDのオンオフができたので、LEDの代わりにリモコン信号を発信する回路・プログラムに変更します。イーサネットシールドを利用した場合、4、10〜13番ピンはイーサネットシールドが利用するため、それ以外のピンを利用して回路を作成します。最終的に、仕様 1. の光センサーの入力回路も合わせたプログラムは下記の通りです。発信する信号や出力するHTMLはお持ちのリモコンのものに変更して試してください。
プログラム:スマートコントローラー回路
#include <SPI.h>
#include <Ethernet.h>
#include "TextFinder.h"
#include <IRremote.h>

IRsend irsend;

byte mac[] = {
  0x90, 0xA2, 0xDA, 0x0F, 0x3F, 0x0D
};  //利用しているイーサネットシールドのMACアドレスを記入
IPAddress ip(192,168,0,20);  //利用しているネットワーク帯のIPアドレス

// Initialize the Ethernet server library
// with the IP address and port you want to use
// (port 80 is default for HTTP):
EthernetServer server(80);

int lightPin  = A1;
int count  = 0;
void setup() {
  // Open serial communications and wait for port to open:
  Serial.begin(9600);
  while (!Serial) {
    ; // wait for serial port to connect. Needed for Leonardo only
  }
  // start the Ethernet connection and the server:
  Ethernet.begin(mac, ip);
  server.begin();
  Serial.print("server is at ");
  Serial.println(Ethernet.localIP());

}

void loop() {

  int sensorValue = analogRead(lightPin);
//*************************************************************
//* 指定した明るさより暗い場合が続いたとき照明をON
//*************************************************************
  if(sensorValue > 660){
    count++;
    if(count > 10){
     // 照明のオン
     for (int i = 0; i < 3; i++) {
        irsend.sendNEC(0xC318F7, 32);
        delay(40);
      }
      Serial.println(" ON");
      count = 0;
    }
  }
  else{
    count = 0;
  }
  delay(1000);

  // listen for incoming clients
  EthernetClient client = server.available();
  if (client) {

//*************************************************************
//* GET形式でデータの受け渡しがあったとき(ブラウザ側からの操作)
//*************************************************************
                TextFinder finder(client);
		if (finder.find("GET"))
		{
			while (finder.findUntil("mode", "\n\r"))
			{
				int val = finder.getValue();
				Serial.println("val="+String(val));
                                //tv on
				if (val == 1)
				{
                                   // テレビ電源ONの信号
                                   for (int i = 0; i < 3; i++) {
                                     irsend.sendSony(0xa90, 12);
                                     delay(40);
                                   }
				   Serial.println(" ON");
				}
                                //light on
				else if (val == 2)
				{
                                   // 照明のオン
                                   for (int i = 0; i < 3; i++) {
                                     irsend.sendNEC(0xC318F7, 32);
                                     delay(40);
                                   }
				   Serial.println(" ON");
				}
			}
		}
//*******************************************

    Serial.println("new client");
    // an http request ends with a blank line
    boolean currentLineIsBlank = true;
    while (client.connected()) {
      if (client.available()) {
        char c = client.read();
        Serial.write(c);
        // if you've gotten to the end of the line (received a newline
        // character) and the line is blank, the http request has ended,
        // so you can send a reply
        if (c == '\n' && currentLineIsBlank) {
          // send a standard http response header
          client.println("HTTP/1.1 200 OK");
          client.println("Content-Type: text/html");
          client.println("Connection: close");  // the connection will be closed after completion of the response
          //client.println("Refresh: 5");  // refresh the page automatically every 5 sec
          client.println();
          client.println("<!DOCTYPE HTML>");
          client.println("<html>");

 //*************************************************
//* bootstrap
 //*************************************************
          client.println("<head>");
          client.println("<link rel='stylesheet' href='https://maxcdn.bootstrapcdn.com/bootstrap/3.3.4/css/bootstrap.min.css'>");
          client.println("<link rel='stylesheet' href='https://maxcdn.bootstrapcdn.com/bootstrap/3.3.4/css/bootstrap-theme.min.css'>");
          client.println("<script src='https://maxcdn.bootstrapcdn.com/bootstrap/3.3.4/js/bootstrap.min.js'></script>");
          client.println("</head>");
 //*************************************************
          client.println("<body>");

          client.println("<a class='btn btn-primary' href='/?mode=1'>TV ON</a> ");
          client.println("<a class='btn btn-primary' href='/?mode=2'>Light ON</a><hr/>");
          // output the value of each analog input pin
          int sensorReading = analogRead(lightPin);
          client.println("Light:");
          client.println(sensorReading);
          client.println("<br />");
          client.println("</body>");
          client.println("</html>");
          break;
        }
        if (c == '\n') {
          // you're starting a new line
          currentLineIsBlank = true;
        }
        else if (c != '\r') {
          // you've gotten a character on the current line
          currentLineIsBlank = false;
        }
      }
    }
    // give the web browser time to receive the data
    delay(1);
    // close the connection:
    client.stop();
    Serial.println("client disconnected");
  }
}
これで、WEBサーバーから操作ができましたね!
まとめ
無事2パターンの機能が実装できスマートコントローラーとして利用ができますね!これで、センサーの値によって自動で家電を制御したり、スマートフォンやPCから家電を制御することができるようになりました。今回光センサーを利用していますが、超音波センサーと組み合わせて人が通ると照明が点く、温度センサーと組み合わせて気温が高くなると扇風機が回る、といった機能を実装すると、よりスマートコントローラーとして面白い使い方ができると思います。
注意:スマートフォンでの操作や、自動で制御を行う場合は、暖房などの場合は火事などの事故を防ぐため必ず近くで実験を行ってください。