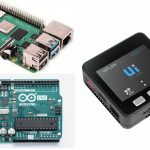
Arduinoシリーズには、UnoやLeonardoなど数多くのArduinoボードが用意されており、さまざまな用途で使い分けることができます。
ほとんどの用途なら一般的に使われるUnoでも十分ですが、特殊な機能が必要な場合であれば専用に設計されたArduinoを使うと、よりスマートにArduinoデバイスを作ることができます。
今回使用するのは、LilyPad(リリーパッド)と呼ばれるArduinoの互換ボードです。
LilyPadは「ウェアラブル」な用途に特化しているのが特徴で、体や服などに取り付けて使用する小型・軽量のマイコンボードとして設計されています。
回路はArduinoボードをベースに開発されているので、通常のArduinoでスケッチを書くのと同じようにArduino IDEを使って動かすことができます。
本記事では、LilyPadに音楽を再生するための電子部品を追加した「LilyPad MP3」を使って音楽プレーヤーを作り、Arduinoの互換ボードの実力を試してみます。
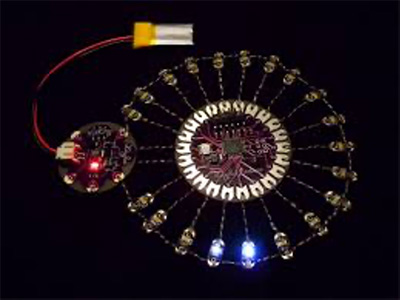
LilyPadに接続されたLED(イメージ)
目次
1. SDカードリーダーがついたArduino
ソフトウェアには、オープンソースソフトウェアと呼ばれる利用者の目的を問わずソースコードを利用できて、自由に変更を加えたり再配布したりすることを容認する考え方があります。(ただし、配布はライセンスに従う必要があります。)
このオープンソースソフトウェアの考えと同じように、ハードウェアにもオープンソース・ハードウェアに基づいた製品開発が行われている分野があります。
オープンソース・ハードウェアは、図面や回路図などの情報が公開されているので、それを元に自分の使いやすいマイコンボードを作成することが認められています。
Arduinoもオープンソース・ハードウェアの一つです。このArduinoを元に、世界中さまざまなArduino互換ボードが展開されています。
その中のLilyPadシリーズは、Arduinoボードと互換性を保ちながら新たな機能を追加したマイコンボードとして発売されました。
このマイコンボードは、「ウェアラブルコンピュータ(体や服などに取り付けて使用する小型・軽量のコンピュータ)」を手軽に作成できるように、E-textiles(Eテキスタイル)(英語)と呼ばれる「電気を通す布」に縫い付けられるように設計されています。
電飾を搭載したドレスは実際にLilyPadを使用して作成されたものです。
LilyPad MP3は手軽に音楽プレーヤーが作成できるように、ArduinoボードにmicroSDカード(マイクロSDカード)リーダー・MP3デコーダ(IC)・ステレオアンプ(IC)・3.5mmヘッドフォンジャックを搭載したマイコンボードです。
あらかじめ完成したスケッチがインストールされているので、トリガーと呼ばれる5本の入力ピンにプッシュボタンを接続するだけで、マイクロSDカードから音声データを読み取り再生できます。
Arduinoボードのように、独自のスケッチを作成して転送することもできますが、音楽プレーヤーとして使用するだけなら、すぐにウェアラブルなMP3プレーヤーを作ることができます。
ちなみに、Arduino UnoでもMP3プレーヤーの機能を搭載することはできますが、Adafruit Waveシールドキット v1.1のようなSDシールドを別途追加する必要があります。もちろん、制御するためのスケッチも自分で書かなくてはいけないので、慣れていない方には少しハードルが高くなってしまいます。
2. 準備
本記事ではLilyPad MP3を使用します。日本ではスイッチサイエンスなどで、取り扱いをしています。
LilyPad MP3とパソコンを接続して、バッテリの充電やスケッチの転送を行うにはFTDI USBシリアル変換アダプターが必要です。
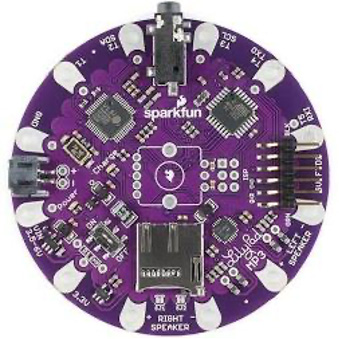
LilyPad MP3の外観
LilyPad以外にプッシュボタンも必要です。
プッシュボタンは1個から5個まで接続できます。5個取り付けることが推奨されていますが、再生だけなら1個でも動作します。
再生する音楽を聴くためには、3.5mmヘッドフォンジャックに接続するスピーカかヘッドフォンを用意します。
LilyPadシリーズは、服などに縫い付けられるように設計されています。作成する音楽プレーヤーをコスチュームなどに縫い付けて使用したい場合は、導電糸を使いましょう。
基板の外周上に並んだ大きめの穴が電極です。この穴を導電糸で縫い付ければ、糸がそのまま電線になり、プッシュボタンまでの配線に使用できます。
日本ではスイッチサイエンスで取り扱っています。
3. スケッチ
LilyPad MP3には、配線するだけですぐに音楽プレーヤーとして動作するように、あらかじめスケッチがインストールされています。
インストールされているスケッチを以下に掲載します。同じものがこちらからダウンロードできます。
このスケッチは、LilyPadを製造・販売しているSparkFun Electronics社のMike Grusin氏が作成したものです。
このスケッチはビールウェアで「もし作者に出会ったら、報酬としてビールをおごってください」と半分ジョークのようなライセンス形態をとっています。少し古い表現では「カンパウェア」や「ドネーションウェア」に近いライセンス形態です。
もちろん、無料で利用しても問題はありません。
また、「ソースコードに何をしてもいいですよ」と明記されているので、コピーや変更も問題ありません。
// "Trigger" example sketch for Lilypad MP3 Player
// Mike Grusin, SparkFun Electronics
// http://www.sparkfun.com

// This sketch (which is preloaded onto the board by default),
// will play a specific audio file when one of the five trigger
// inputs (labeled T1 - T5) is momentarily grounded.

// You can place up to five audio files on the micro-SD card.
// These files should have the desired trigger number (1 to 5)
// as the first character in the filename. The rest of the
// filename can be anything you like. Long file names will work,
// but will be translated into short 8.3 names. We recommend using
// 8.3 format names without spaces, but the following characters
// are OK: .$%'-_@~`!(){}^#&. The VS1053 can play a variety of
// audio formats, see the datasheet for information.

// By default, a new trigger will interrupt a playing file, except
// itself. (In other words, a new trigger won't restart an
// already-playing file). You can easily change this behavior by
// modifying the global variables "interrupt" and "interruptself"
// below.

// This sketch can output serial debugging information if desired
// by changing the global variable "debugging" to true. Note that
// this will take away trigger inputs 4 and 5, which are shared
// with the TX and RX lines. You can keep these lines connected to
// trigger switches and use the serial port as long as the triggers
// are normally open (not grounded) and remain ungrounded while the
// serial port is in use.

// Uses the SdFat library by William Greiman, which is supplied
// with this archive, or download from http://code.google.com/p/sdfatlib/

// Uses the SFEMP3Shield library by Bill Porter, which is supplied
// with this archive, or download from http://www.billporter.info/

// License:
// We use the "beerware" license for our firmware. You can do
// ANYTHING you want with this code. If you like it, and we meet
// someday, you can, but are under no obligation to, buy me a
// (root) beer in return.

// Have fun!
// -your friends at SparkFun

// Revision history:
// 1.0 initial release MDG 2012/11/01

// We'll need a few libraries to access all this hardware!

#include <SPI.h> // To talk to the SD card and MP3 chip
#include <SdFat.h> // SD card file system
#include <SFEMP3Shield.h> // MP3 decoder chip

// Constants for the trigger input pins, which we'll place
// in an array for convenience:

const int TRIG1 = A0;
const int TRIG2 = A4;
const int TRIG3 = A5;
const int TRIG4 = 1;
const int TRIG5 = 0;
int trigger[5] = {TRIG1, TRIG2, TRIG3, TRIG4, TRIG5};

// And a few outputs we'll be using:

const int ROT_LEDR = 10; // Red LED in rotary encoder (optional)
const int EN_GPIO1 = A2; // Amp enable + MIDI/MP3 mode select
const int SD_CS = 9; // Chip Select for SD card

// Create library objects:

SFEMP3Shield MP3player;
SdFat sd;

// Set debugging = true if you'd like status messages sent
// to the serial port. Note that this will take over trigger
// inputs 4 and 5. (You can leave triggers connected to 4 and 5
// and still use the serial port, as long as you're careful to
// NOT ground the triggers while you're using the serial port).

boolean debugging = false;

// Set interrupt = false if you would like a triggered file to
// play all the way to the end. If this is set to true, new
// triggers will stop the playing file and start a new one.

boolean interrupt = true;

// Set interruptself = true if you want the above rule to also
// apply to the same trigger. In other words, if interrupt = true
// and interruptself = false, subsequent triggers on the same
// file will NOT start the file over. However, a different trigger
// WILL stop the original file and start a new one.

boolean interruptself = false;

// We'll store the five filenames as arrays of characters.
// "Short" (8.3) filenames are used, followed by a null character.

char filename[5][13];


void setup()
{
    int x, index;
    SdFile file;
    byte result;
    char tempfilename[13];

    // Set the five trigger pins as inputs, and turn on the
    // internal pullup resistors:

    for (x = 0; x <= 4; x++)
    {
        pinMode(trigger[x], INPUT);
        digitalWrite(trigger[x], HIGH);
    }

    // If serial port debugging is inconvenient, you can connect
    // a LED to the red channel of the rotary encoder to blink
    // startup error codes:

    pinMode(ROT_LEDR, OUTPUT);
    digitalWrite(ROT_LEDR, HIGH); // HIGH = off

    // The board uses a single I/O pin to select the
    // mode the MP3 chip will start up in (MP3 or MIDI),
    // and to enable/disable the amplifier chip:

    pinMode(EN_GPIO1, OUTPUT);
    digitalWrite(EN_GPIO1, LOW); // MP3 mode / amp off

    // If debugging is true, initialize the serial port:
    // (The 'F' stores constant strings in flash memory to save RAM)

    if (debugging)
    {
        Serial.begin(9600);
        Serial.println(F("Lilypad MP3 Player trigger sketch"));
    }

    // Initialize the SD card; SS = pin 9, half speed at first

    if (debugging) Serial.print(F("initialize SD card... "));

    result = sd.begin(SD_CS, SPI_HALF_SPEED); // 1 for success

    if (result != 1) // Problem initializing the SD card
    {
        if (debugging) Serial.print(F("error, halting"));
        errorBlink(1); // Halt forever, blink LED if present.
    }
    else if (debugging) Serial.println(F("success!"));

    // Start up the MP3 library

    if (debugging) Serial.print(F("initialize MP3 chip... "));

    result = MP3player.begin(); // 0 or 6 for success

    // Check the result, see the library readme for error codes.

    if ((result != 0) && (result != 6)) // Problem starting up
    {
        if (debugging)
        {
            Serial.print(F("error code "));
            Serial.print(result);
            Serial.print(F(", halting."));
        }
        errorBlink(result); // Halt forever, blink red LED if present.
    }
    else if (debugging) Serial.println(F("success!"));

    // Now we'll access the SD card to look for any (audio) files
    // starting with the characters '1' to '5':

    if (debugging) Serial.println(F("reading root directory"));

    // Start at the first file in root and step through all of them:

    sd.chdir("/", true);
    while (file.openNext(sd.vwd(), O_READ))
    {
        // get filename

        file.getFilename(tempfilename);

        // Does the filename start with char '1' through '5'?

        if (tempfilename[0] >= '1' && tempfilename[0] <= '5')
        {

            // Yes! subtract char '1' to get an index of 0 through 4.

            index = tempfilename[0] - '1';

            // Copy the data to our filename array.

            strcpy(filename[index], tempfilename);

            if (debugging) // Print out file number and name
            {
                Serial.print(F("found a file with a leading "));
                Serial.print(index + 1);
                Serial.print(F(": "));
                Serial.println(filename[index]);
            }
        }
        else if (debugging)
        {
            Serial.print(F("found a file w/o a leading number: "));
            Serial.println(tempfilename);
        }

        file.close();
    }

    if (debugging)
        Serial.println(F("done reading root directory"));

    if (debugging) // List all the files we saved:
    {
        for(x = 0; x <= 4; x++)
        {
            Serial.print(F("trigger "));
            Serial.print(x + 1);
            Serial.print(F(": "));
            Serial.println(filename[x]);
        }
    }

    // Set the VS1053 volume. 0 is loudest, 255 is lowest (off):

    MP3player.setVolume(10, 10);

    // Turn on the amplifier chip:

    digitalWrite(EN_GPIO1, HIGH);
    delay(2);
}


void loop()
{
    int t; // current trigger
    static int last_t; // previous (playing) trigger
    int x;
    byte result;

    // Step through the trigger inputs, looking for LOW signals.
    // The internal pullup resistors will keep them HIGH when
    // there is no connection to the input.

    // If serial debugging is on, only check triggers 1-3,
    // otherwise check triggers 1-5.

    for(t = 1; t <= (debugging ? 3 : 5); t++)
    {
        // The trigger pins are stored in the inputs[] array.
        // Read the pin and check if it is LOW (triggered).

        if (digitalRead(trigger[t - 1]) == LOW)
        {
            // Wait for trigger to return high for a solid 50ms
            // (necessary to avoid switch bounce on T2 and T3
            // since we need those free for I2C control of the
            // amplifier)

            x = 0;
            while(x < 50)
            {
                if (digitalRead(trigger[t - 1]) == HIGH)
                    x++;
                else
                    x = 0;
                delay(1);
            }
            if (debugging)
            {
                Serial.print(F("got trigger "));
                Serial.println(t);
            }

            // Do we have a valid filename for this trigger?
            // (Invalid filenames will have 0 as the first character)

            if (filename[t - 1][0] == 0)
            {
                if (debugging)
                    Serial.println(F("no file with that number"));
            }
            else // We do have a filename for this trigger!
            {
                // If a file is already playing, and we've chosen to
                // allow playback to be interrupted by a new trigger,
                // stop the playback before playing the new file.

                if (interrupt && MP3player.isPlaying() && ((t != last_t) || interruptself))
                {
                    if (debugging)
                        Serial.println(F("stopping playback"));

                    MP3player.stopTrack();
                }

                // Play the filename associated with the trigger number.
                // (If a file is already playing, this command will fail
                // with error #2).

                result = MP3player.playMP3(filename[t - 1]);

                if (result == 0) last_t = t; // Save playing trigger

                if(debugging)
                {
                    if(result != 0)
                    {
                        Serial.print(F("error "));
                        Serial.print(result);
                        Serial.print(F(" when trying to play track "));
                    }
                    else
                    {
                        Serial.print(F("playing "));
                    }
                    Serial.println(filename[t - 1]);
                }
            }
        }
    }
}


void errorBlink(int blinks)
{
    // The following function will blink the red LED in the rotary
    // encoder (optional) a given number of times and repeat forever.
    // This is so you can see any startup error codes without having
    // to use the serial monitor window.

    int x;

    while(true) // Loop forever
    {
        for (x = 0; x < blinks; x++) // Blink the given number of times
        {
            digitalWrite(ROT_LEDR, LOW); // Turn LED ON
            delay(250);
            digitalWrite(ROT_LEDR, HIGH); // Turn LED OFF
            delay(250);
        }
        delay(1500); // Longer pause between blink-groups
    }
}
スケッチの中の重要なポイントを解説します。
MP3形式の音声データを処理するためにライブラリを使用します。
ライブラリについては、Arduinoボードに追加された機能を使用するために、互換ボードを販売しているメーカーから提供されているのが一般的です。
以下は、LilyPad MP3で提供されているライブラリで使用する関数です。
- setVolume()関数: ボリュームを調整します。
- isPlaying()関数: MP3形式の音声データが再生中か確認します。
- stopTrack()関数: 再生中のトラックを停止します。
- playMP3()関数: マイクロSDカードに記録されている音声データを再生します。接続されたプッシュボタンに対応する番号の音声データが再生します。
これらの関数は、基板上に搭載されているVS1053BというMP3形式の音声データをデコードするICを制御するために使われます。
スケッチで読み込むMP3形式の音声データは、マイクロSDカード上の5ファイル(最大)です。
ボードの名前はLilyPad MP3ですが、再生できる形式はMP3だけではありません。対応する形式は一覧(英語)を確認してください。
ファイル名は何でも構いません。ただし、数字の1〜5で始めてください。
再生する音声データは、プッシュボタン(LilyPad MP3ではトリガーと呼びます)の番号とファイル名の先頭の数字に対応します。
基板上にの端子の横にT1・T2・…・T5と印刷されています。この数字の部分がトリガーの番号です。
4. 配線
配線は簡単です。マイクロSDカードをスロットに挿入して、スピーカかヘッドフォンをヘッドフォンジャックに接続してください。
LilyPad MP3は基板上にスピーカ(左右)を接続する端子もあり、ここにスピーカを直接接続することもできます。
プッシュボタンをT1・T2・…・T5の端子に接続してください。再生する音声データのファイル名につけられた数字とトリガー番号が対応していれば、5個接続する必要はありません。
プッシュボタンの片側はトリガーへ、もう片方はGNDに接続します。
基板の外周上に大小の穴がセットで並んでいます。小さい穴は半田付け用、大きい穴は導電糸を巻き付けるためのものです。
バッテリを接続すれば動作が始まります。プッシュボタンを押せば対応する音声データが再生されます。
5. まとめ
Arduinoはオープンソース・ハードウェアで展開されているプロジェクトです。
マイコンボードの回路図が公開されているので、一定のルールを守れば誰でもその回路図を使って製品を作ることができます。そこで多くのメーカーが、オリジナルの機能を追加したArduinoの互換ボードを販売しています。
今回のLilyPadもその中の一つで、今回のLilyPad MP3のほかにも、USB端子を追加したLilyPad USB PLUSや無線モジュールを搭載したLilyPad XBeeなども展開されています。
Arduinoには、ライブラリやシールドのような機能を拡張するオプションも多数ありますが、作成する機器によっては設計が難しくなってしまうケースも珍しくありません。
Arduinoの互換ボードは、制御はArduinoボードと同じようにスケッチで動かせて、特定の機能を強化したボードのように考えることができます。そのため、初心者でも安心して電子工作を楽しめます。
ぜひ皆さんも、用途に合ったArduinoの互換ボードを探してみてください。


